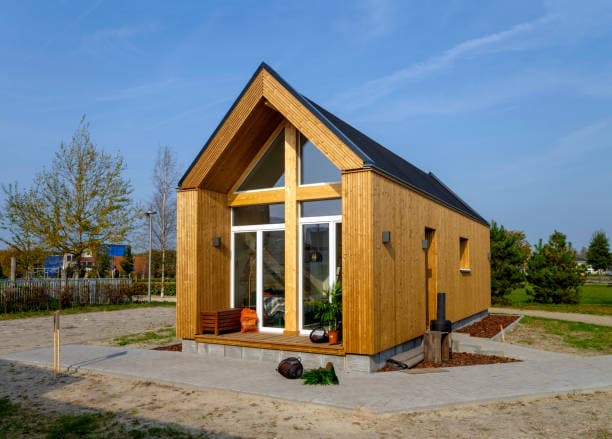
Building your own tiny home is an exciting and rewarding journey that allows you to create a customized, functional, and cost-effective living space. Whether you’re looking to downsize, live off-grid, or simply embrace a minimalist lifestyle, constructing a tiny home requires careful planning and execution. This step-by-step guide will walk you through the entire process, from initial planning to final touches, to help you successfully build your dream tiny home.
Step 1: Planning and Designing Your Tiny Home
Before starting construction, it’s crucial to have a well-thought-out plan. Consider the following factors:
- Purpose and Lifestyle: Determine how you intend to use your tiny home—full-time living, a vacation retreat, or a rental property.
- Budget: Establish a realistic budget for materials, labor, and unforeseen expenses.
- Legal Considerations: Research zoning laws, building codes, and permit requirements in your area.
- Size and Layout: Choose the ideal dimensions for your home and create a layout that maximizes space efficiency.
- Mobility: Decide whether you want a stationary tiny home or a mobile one on a trailer.
Using design software or consulting a professional architect can help you refine your vision before moving forward.
Step 2: Choosing a Foundation
The foundation you choose will depend on whether your tiny home will be stationary or mobile:
- Trailer Foundation: Ideal for mobility; choose a high-quality trailer rated for the weight of your home.
- Concrete Slab or Pier Foundation: Best for permanent tiny homes, offering stability and longevity.
- Skid Foundation: Allows for easy relocation but remains semi-permanent.

Step 3: Gathering Materials and Tools
Once your design is finalized, start sourcing the necessary materials. Common materials include:
- Framing: Wood or steel for structural support
- Insulation: Spray foam, rigid foam, or fiberglass for temperature control
- Exterior Siding: Wood, metal, or composite materials for durability
- Roofing: Metal or shingle roofing to withstand weather conditions
- Windows and Doors: Energy-efficient options to enhance insulation
Ensure you have essential tools such as power drills, saws, measuring tape, and safety gear.
Step 4: Building the Frame and Structure
With your materials ready, you can start constructing the frame:
- Build the Foundation: Secure your tiny home to the trailer or lay the foundation.
- Construct the Walls: Assemble the wall frames and attach them to the foundation.
- Add the Roof: Install roof trusses and cover them with sheathing and waterproofing materials.
- Install Windows and Doors: Cut out openings and fit them securely.
Step 5: Electrical and Plumbing Systems
Installing electrical and plumbing systems is a critical step that should be done with precision:
- Electrical Wiring: Run wiring through the walls and install outlets, switches, and lighting fixtures.
- Plumbing: Set up water supply lines, drainage, and sewage systems.
- Power Source: Connect to a main power supply or install solar panels for an off-grid setup.
Consulting a licensed electrician and plumber is advisable to ensure compliance with safety regulations.
Step 6: Insulation and Interior Finishing
Proper insulation keeps your tiny home comfortable in all seasons. Choose between spray foam, fiberglass, or rigid foam insulation. Once insulated, proceed with:
- Drywall or Paneling: Cover interior walls for a finished look.
- Flooring: Install hardwood, laminate, or vinyl flooring for durability.
- Ceiling and Lighting: Add aesthetic ceiling panels and appropriate lighting fixtures.
Step 7: Customizing Interior Spaces
Maximizing space is key in a tiny home. Consider the following:
- Multi-Functional Furniture: Murphy beds, foldable tables, and convertible couches.
- Storage Solutions: Built-in shelves, under-bed storage, and wall-mounted racks.
- Kitchen Design: Compact appliances and space-saving cabinetry.
- Bathroom Setup: Composting toilets and small showers to conserve space.
Step 8: Exterior Finishing and Landscaping
The exterior should be durable and visually appealing. Complete the following steps:
- Exterior Siding and Paint: Apply weather-resistant siding and paint.
- Roofing: Ensure the roof is properly sealed and leak-proof.
- Outdoor Space: Add a deck, porch, or small garden for extra living space.
Step 9: Final Inspection and Safety Checks
Before moving in, perform a thorough inspection:
- Structural Integrity: Check for any weak spots or unfinished areas.
- Electrical and Plumbing: Test all systems for leaks or faulty wiring.
- Safety Equipment: Install smoke detectors, fire extinguishers, and carbon monoxide detectors.
Step 10: Moving In and Enjoying Your Tiny Home
Once everything is set, furnish your tiny home and personalize the space to suit your needs. Enjoy the benefits of a simpler, more sustainable lifestyle!
Building your own tiny home is a challenging but rewarding project that allows you to create a space tailored to your lifestyle. By following these step-by-step guidelines, you can construct a functional, stylish, and efficient tiny home that meets your needs. Whether you’re seeking mobility, sustainability, or affordability, a well-planned tiny home can offer comfort and independence for years to come.


